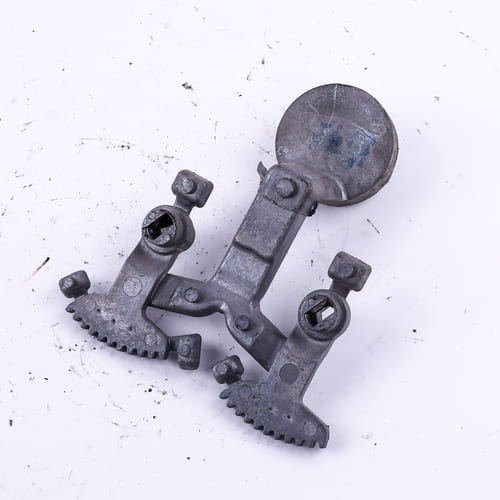
A die casting mold is possibly the most important component in die casting production. It’s essentially a customized cavity which, when aluminum is forced inside, allows your intricate design to spring to life.
Leveraging our industry experience, we manufacture first-rate die cast molds. We offer excellent and one-stop tooling solutions, ranging from tooling design to product delivery. Our molds are high-precision, reliable and customized based on each customer’s needs.
At Castingod, we have a team of adept professionals with in-depth technical competency and we produce our die cast molds with automated machinery. We serve a variety of industries. Our molds are used to manufacture products such as auto parts, aerospace components, electrochemical parts, power tool parts, etc.
When producing our molds, we pay meticulous attention to details and we adhere to the best industry standards. We use advanced mold flow analysis techniques. Before production, we carry out virtual simulation which illustrates the metal flow during the production stage. This enables us to make adequate analysis before producing with a design.
We are committed to manufacturing high-grade die cast molds!
It is not easy to introduce all aspects of custom mould, so we have prepared a lot of information on this page for you to delve into. To make sure you can find the information you want quickly, we have prepared this content directory that will jump to the corresponding location when you click on it.
- A mold is a cavity or matrix in which a fluid or plastic substance is shaped into a desired or finished product. It is a hollow or fixed frame that the molten metal is poured into in die casting.
- In die casting, you need an object to pour the molten metal into. The object has to be in the desired shape you want the casting to be. That object is the mold. What a die casting mold does is to create the shape for the die castings. The cast products made from a mold would have the exact likeness of the mold’s shape.
- The molten metal will be forced under high pressure into the mold. The metal will then shrink inside the mold and grip the core upon solidification. After solidification, the cast product will take the shape of the mold
- Mold requires careful design. The more complex the design of the casting, the more the mold becomes complex. To design the mold, you can use the 3D CAD/CAM systems. Computer-aided simulation calculation will help you make the mold optimally adapted to the die-cast parts.
- The shape of a mold is determined by the model or pattern. A model is any dimensional object whose shape you want to reproduce with the mold and casting.
- The mold design affects the shape, uniformity, configuration, quality, dimensions and contours of die castings. An improper mold specification can lead to inferior die cast products, material corrosion, etc.
- So, before preparing the mold, you should consider the dimensions and geometry of the castings you want to manufacture. You should calculate the design of the mold according to the size of the casting.
- Mold makes it easy to manufacture millions of die cast parts seamlessly. You can repeatedly use a mold to manufacture similar die castings.
- To make a mold, use a material with higher strength and melting temperature than the material you want to cast. If not, the die can get damaged during the casting process.die casting mold uses strong metals.

Note that:
- You should ensure a uniform cross-section of the mold. If at all there is a need for changes in the cross-section, effect the changes slowly to avoid irregular shrinkage and porosity.
- Preferably, you can consider not designing the molds on flat surfaces as this consume lots of materials. If at all the mold will be on a flat surface, ensure the corners of the surface are rounded. This will improve the surface appearance and promote natural flow.
- Cut out the thick/heavy parts of the mold. Otherwise, you might need more metals in your castings and may take a longer time to cast.
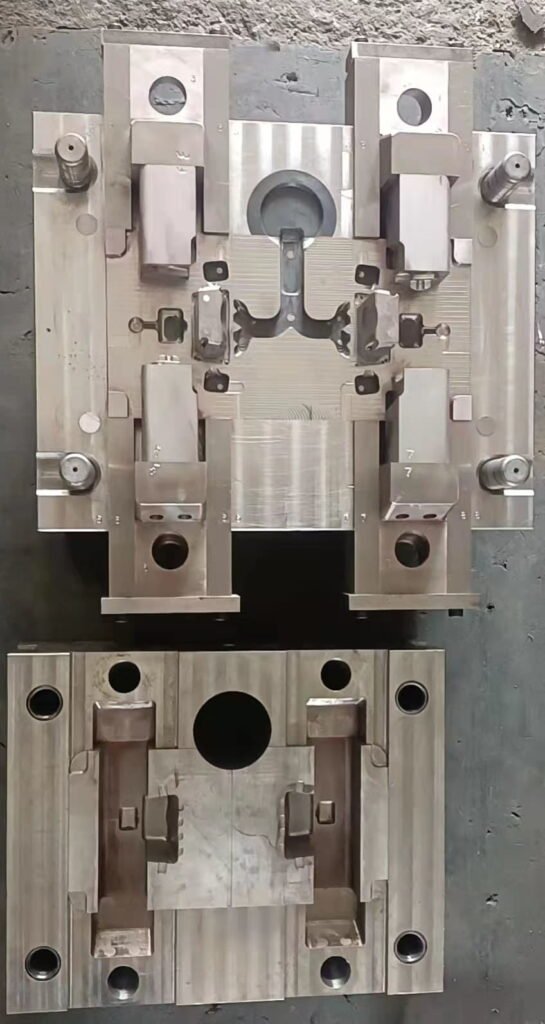
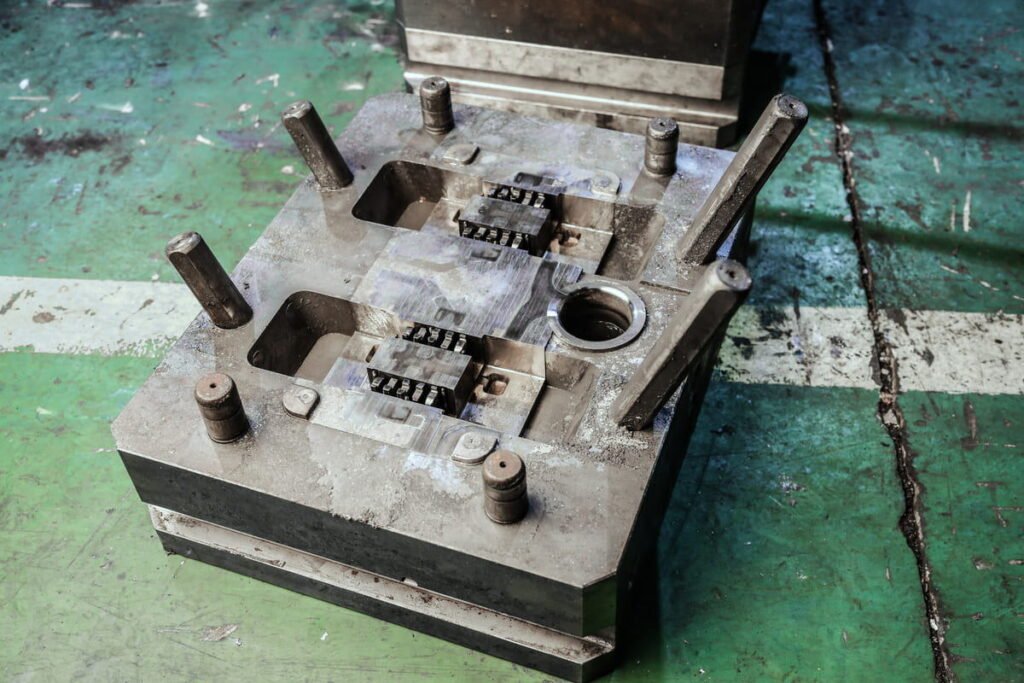
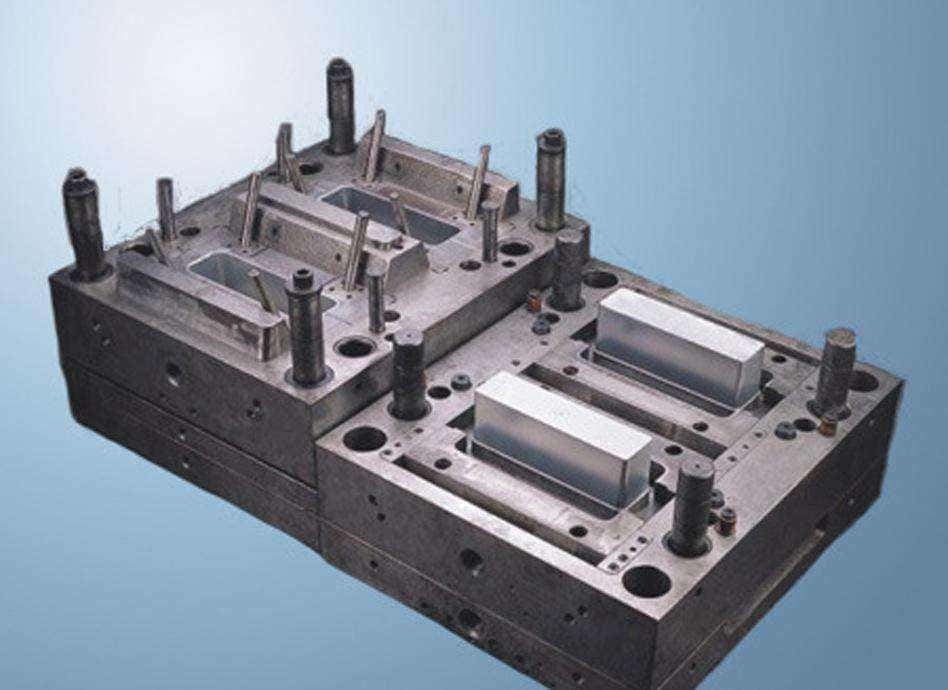
A mold consists of two halves. The first half is known as the ‘A’ half or the stationary side. It is otherwise known as the cavity. The ‘A’ half of the mold produces the outer part of the die-cast products. The second half is the ‘B’ half or the moving side. It is also known as the ‘core’.
Other components of a mold include the ejector pins, lifters, sprue, support plate, gate, runner leader pins, locating ring, etc. The ejector box houses the ejector pins, blades and mechanical lifters. The sprue is the medium through which molten metal is injected into the mold from the nozzle.
The leader pins are in the four corners of the mold. They align the two halves of the mold. The gate is the opening through which the molten metal is injected into the mold.
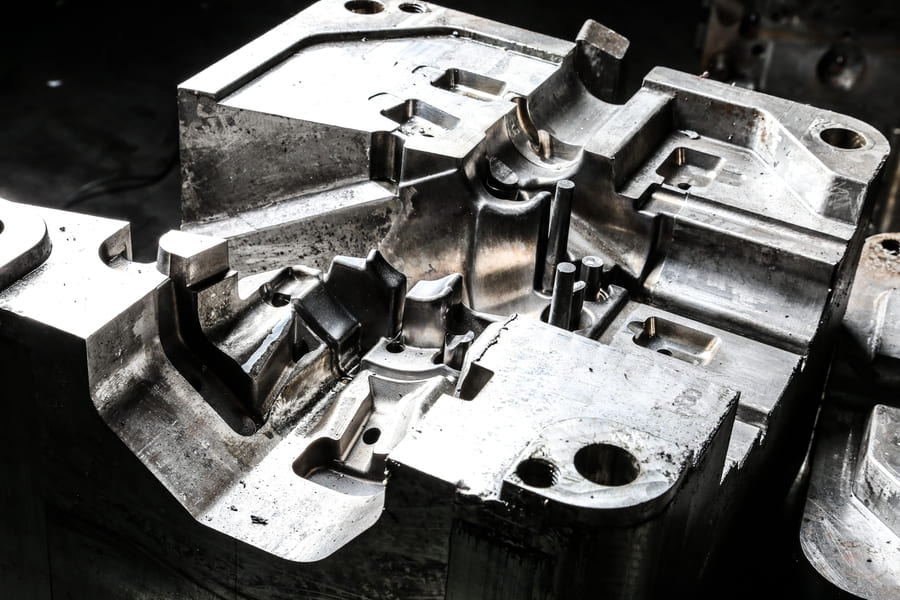
1.The Cavity
- This is the first side of the mold. The cavity constitutes the external shape of the die castings. It is the area of the mold that the molten metal fills to form the desired shape. Once the cavity is filled, pressure is maintained to compensate for material shrinkage. This results in the shaping of the die castings.
- A mold can have one or multiple cavities. This is to enable a swift, seamless and efficient process of filling (the mold) with molten metal. A multi-cavity mold has more than one cavity. and produces more than one die-cast part at a time.
- This increases production output and the production process is faster. Although this type of mold has multiple cavities, the cavities come in different sizes and shapes. Though, ensure there is no imbalance in the different parts
2.The Core

The core is the second half of a mold. It is a preformed, bonded, sand insert placed into the mold to shape the interior of a casting (or a part of the casting) that cannot be shaped by casting.
- Cores are used to create more complexity in the casting designs. They create holes or chambers in a casting. Cores help to create angles that are impossible with a pattern. Note that castings using internal cores usually have some opening in the outer shell of their molding. This is to extract the core after the casting.
By placing a core in the mold, the mold gets stronger. Cores also aid the gating system. The splash core prevents erosion in the gates and runners of the mold. The pouring basin core provides a cup or basin at the top of the mold for the molten metal to enter.
3.The Ejector Pins
- The ejector pins help to remove the castings. There is a plate on the core side of the mold that pushes the ejector pin forward. The pins advance with force, thereby causing the casting to eject from the mold cavity.
- The ejector pins are located on the core side of a mold. They are an integral component of the ejection system in a mold. They push the castings out of the mold. This improves production speed.
- The ejector pins should have a tested design. Any error in the design may cause the castings to crack or shrink.
- There are different types of ejector pins. These include the case hardened, black, and thought-hand ejector pins. The case hardened ejector pins are harder pins. They are nitrated to 60-70 HRC. They can also withstand temperatures above 200°c.
4.The Lifter

- This is the part of the injection molding mechanism that travels with the ejection stroke. It moves on an angle to slide and pull the cavity steel away from the undercuts in the die. It is mainly used for internal undercuts of a molded plastic part. It enables lateral movement of the die casting during ejection.
- The lifter has two parts, which are the body and the forming parts. There are two types of lifters. These are the integral and non-integral lifters. If the body and the forming parts are integrated, it is an integral lifter. The integral lifter is compact, damage-resistant and strong.
- The lifter can also be classified into the T-shape and cylindrical lifter. The T-shape is usually used for larger die castings with high precision requests. It is not as commonly used as the cylindrical lifter. The cylindrical lifter is easy to process, install and maintain.
5.Sprue
- This is a part of the gating system. The sprue directs the molten metal to the runner. It provides enough pressure to make the liquid metal overcome all kinds of flow resistance under gravity.
- It usually has a large diameter and is always removed after die castings. The common sprue shapes include column shape with equal section, big top and small bottom, small top and big bottom, etc.
- To reduce turbulence and formation of air bubbles, the sprue should be tapered downwards.

6.Runner

- The runner is also part of the gating system of a mold. It is a machined groove located between the sprue and the gate. It is the channel in the mold that allows the flow of molten metal into the gate.
- There are two types of runners. These are the hot runners and the cold runners. The hot runner molds contain plastics that are heated through a manifold system. It has heating rings and rods. It keeps the material molten till it flows into the mold cavity
- On the other hand, the cold runner molds consist of unheated channel. The channel should be larger to ensure proper flow of plastic through each cycle. Cold runner mold is less expensive to maintain than a hot runner.
7.Gate
- This is the small area between the runner and the mold cavity. It is the opening in the mold through which the molten metal gets into the mold cavity.
- Depending on the material and casting, the gates can be located in different parts around the mold cavity. Preferably, place the gate at the thickest wall of the part. It should have a thickness of almost two-thirds of the wall size.
- The gate size should not be too small. Else, there may be a build-up of material into the cavity.
- Also, always put the gates in hidden areas. Gates leave blemishes when removed. And so, placing them in visible areas may affect the aesthetics of the castings.
(1.) Draft
- The draft is the taper you apply to the vertical walls of the mold. It is the degree of taper of a side wall or the angle of clearance to facilitate the removal of die-cast parts from a mold. It is measured in terms of angle. The mold usually have draft angles that face both the cavity and core.
- Without the taper, you may be unable to eject the die casts parts, except you manually peel the part out of the mold. Drafting prevents warpage after injecting the molten metal. It also subsidizes production costs by reducing the cooling time.
- The taper enhance moderate ejection force during ejection. This reduces the time needed for ejection. Drafting helps to maintain a uniform, smooth and unscratched finishing to the die castings.
- Right from the prototype to the design stage, you have to incorporate the draft. When you design the mold with the draft angles early, you won’t need to redesign the mold to accommodate the drafting process.

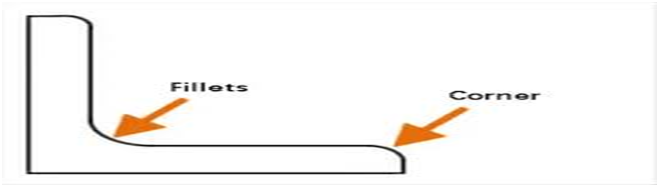

(2.) Fillets
- Generally, where two surfaces should come at a sharp angle, you can create a curved part. A fillet is a sharp-edge breaking feature that adds a radius, either concave or convex, to the interior corner of a mold. It is a junction you can use to shape your mold and smooth an angled surface.
- You should avoid sharp corners in your mold. This is especially in places where there is a rapid change in the cross-section of the design.
- Irregular and sharp corners in the mold can hinder the casting process. So, you can use the fillets to create rounded edges around the mold. Fillets eliminate cracks, and tears at the reentry angle. You can use it to avoid hard edges and undesired corners in your castings.
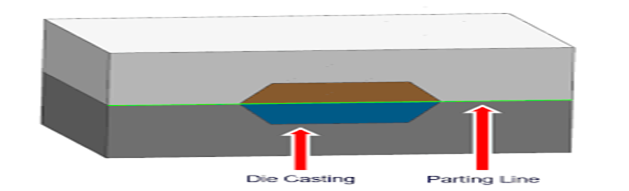
(3.) Parting Line
- The parting line is the borderline,It separates the fixed half and moving half of a mold.
- The parting line determines the direction of mold opening. Consequently, it determines the direction in which the features will be drafted for easy injection. Think of the parting line as the line that divides the mold so that the castings can be removed easily.
- When the mold body is closed, the contact surface of the cavity and the core plates makes the parting line. In simple molds, it is usually just a line that runs straight down the middle. In complex molds, it may be in any other location.
- The gates, overflow and vents connect to the casting at the parting line. You need to determine the parting line of a casting at the early production stage. Position the parting line to allow smooth metal flow. This will improve the die cast quality and the mold life span.

(4.) Ribs
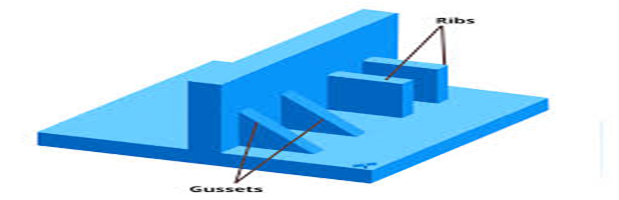
- Ribs are thin extensions that run perpendicular from a wall or plane. They are wall-like, thin features designed into the geometry of a mold. You have to place them in a load-bearing direction.
- Ribs add rigidity and support to the injection molded parts. They are often used to replace thick wall sections to avoid warps, voids, sink marks, etc They strengthen the mold without increasing the wall thickness. They add internal support to the walls, bosses and other features of the mold. Also, they provide a path for metal penetration.
- Although taller ribs can provide the necessary support to the mold. However, such ribs can cause serious defects in castings if not properly sized. A rib that is too tall can break off when casting or ejecting the mold. Such damage will affect the production process.
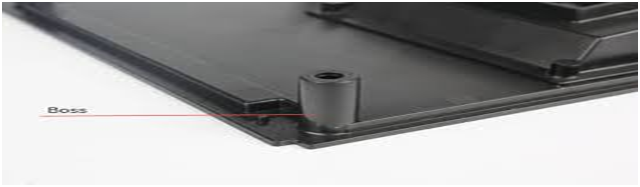
(5.) Bosses
These are knobs that function as mounting points or stand-offs in mold design. Bosses create points at which assembled products can be fastened together. They serve as receptacles for a threaded screw or insert.
Before designing the boss, determine its hole size. Advisably, you can move the boss inwards, and not near exterior walls. Use coring ribs to connect the boss to the exterior wall of the mold without risking sink.
Ensure the boss is properly placed and not oversized. Otherwise, this can cause sink marks on opposing walls of the injection molded parts.

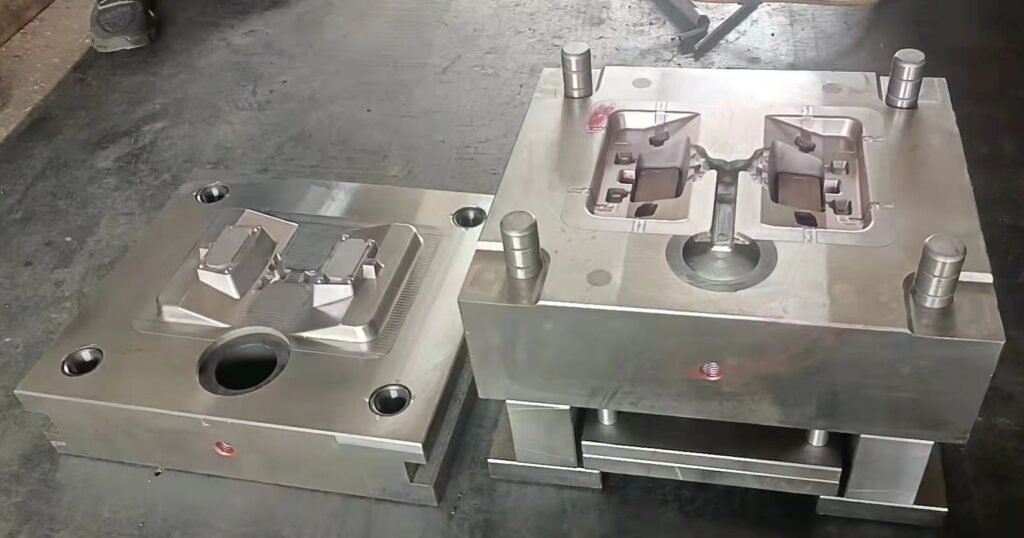
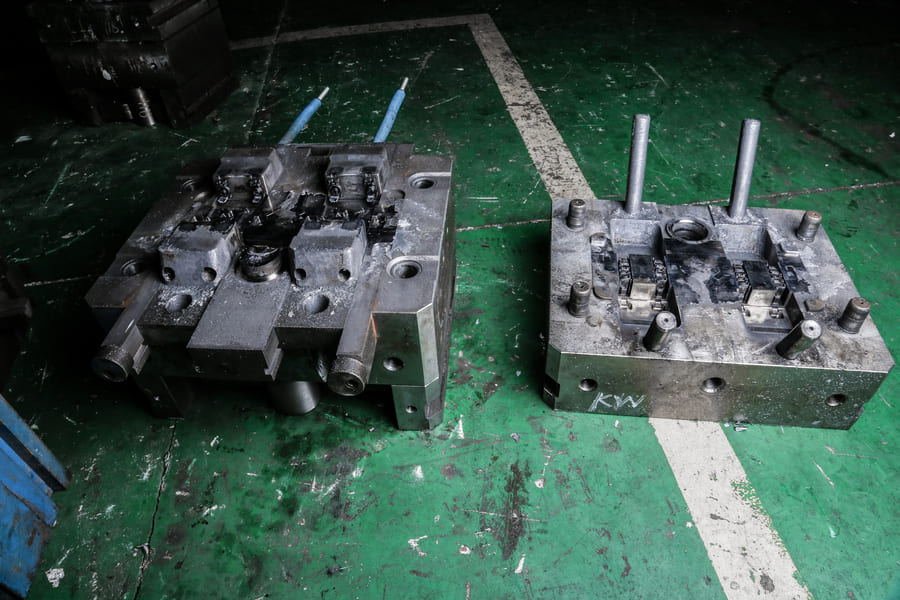
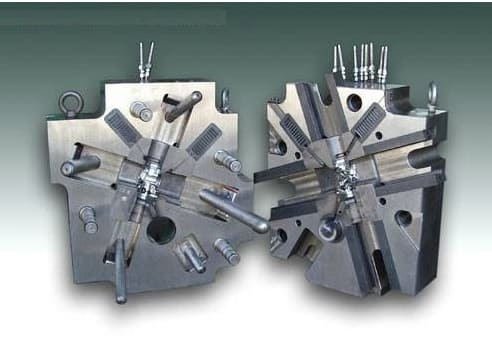
Die casting molds are typically designed to have two halves. They each form intricate cavities which the molten aluminum is forced inside to create the unique shape and contours of your final product.
When the aluminum has hardened, the molds are removed and can then be used again and again to replicate the same die casting.
The manufacturing process of die-casting moulds is the same, but the production cycle will be different because the size and requirements of each product are different, so the requirements of multiple moulds are also different. We can give a clear lead time according to your product
Step 1: Design (2-5days)
According to requirements of the product to design mold , communicate with the customer which is the best solution, mold design need to consider a variety of factors, first, the size of the die casting machining which can match the mold, the second, the mold mechanism is conducive to die casting. The third product subsequent demand

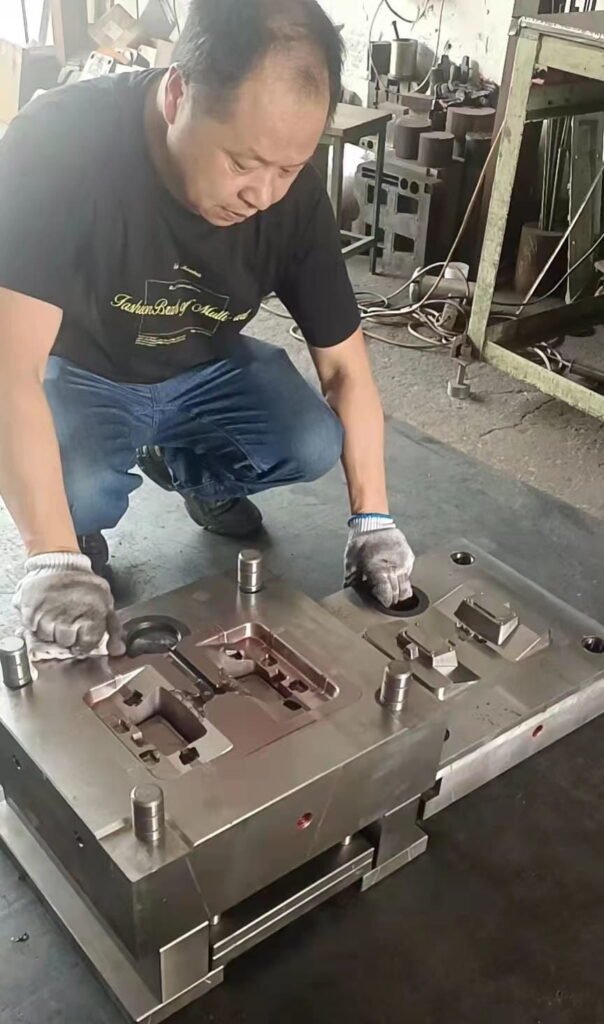
Step 2:Machining (25--30 days)
The machining process of the mold is more procedures, the core includes grinder, CNC hardening, wire cutting, EDM, lightening, several of which need to be done repeatedly, the mold frame is relatively simple, CNC, punching, debugging, and finally the core and frame are assembled.

Step 3: Make samples (within 1-3 day)
After the mold is assembled, we start to proof, the purpose of proofing is to test whether the mold is made successfully, if there is an error, we have the mold disassembled for processing, so repeated operations,until know that the mold meets all the requirements, in general, the most will try 2 times on success

Step 4: Shipping (7-20 days)
The time required is different depending on the mode of transport. Air freight is fast, but more expensive, sea freight is cheaper, but takes longer, you can choose according to your situation

Advantages
- Aluminium die casting molds improve production efficiency. They produce die-cast parts with superior physical attributes and excellent finishing.
- They ensure high die casting quality and consistency. When manufacturing large-volume parts with high tolerance, it is preferable to use mold. All the cast parts will have exactly similar design.
- They are suitable for both medium and high-volume productions. The average cycle time for a unit die casting is 10-60 seconds, depending on the size and complexity of the mold. So, you can produce thousands and millions of parts within a relatively short time.
- Aluminium die casting molds are durable and you can repeatedly use them. Averagely, a mold lasts between 5,000 to 10,000 cycles.
- Although the initial cooling costs for molds are high, they are cost-effective. The production cost per unit will reduce. Also, using molds reduces post-production scrap as you can re-use the aluminium.
Disadvantages
- To manufacture molds, it involves high initial tooling costs. Manufacturing molds require various processes such as initial design, testing, prototyping, machining, etc. These processes are quite expensive. They can run into some thousands of dollars.
- Because of the high initial tooling costs, molds are not suitable for small-scale die cast productions.
- The initial period of mold making is time-consuming and can span several weeks or months. So, in the first instance, if you want to manufacture cast parts urgently, using molds isn’t suitable.
- Mold designing has some limitations. For example, you have to avoid sharp edges and undercuts. You should also use draft and radii to enhance seamless ejection of the cast parts. Moreso, it is difficult and expensive to make any changes to a mold design.
Mold production involves complex processes such as designing, prototyping, pricing, assembly, debugging, machining, etc.
Generally, mold production involves:
(a ) Mold designing
(b.) Mold core and frame machining
(c.) Mold Assembly
(a.) Mold design
- This is the first stage of mold production. It is designing the shape and geometry of the mold using the 3D/CAD system.
In designing mold:
- Determine the location of the cavity, core, ejector pins, lifter, sprue, gate, support plate, runner, locating ring, etc. Also, determine the runner system and the number of cavity (s) the mold will have.
- Apply draft angles to the vertical walls of the mold.
- Avoid irregular and sharp corners in the mold. Such corners can hinder the casting processes. Use fillets to avoid sharp edges.
- Ensure the boss is properly placed. It should not be oversized or undersized. Avoid sharp corners in the boss by using a radius on the core pin
- In designing the parting line, determine the opening direction of the mold relative to the cast parts. Also, avoid side parting line.
- Design the slender cores as inserted parts. This is because these cores are likely to break in long production. So, designing these cores as inserted parts will make them easily replaceable.
- Design the guide pins to be longer than the longest core ejection. This will make the pins enter the bushings before the cores enter the cavity.
- Ensure the stake line outlets and inlets do not interfere with the mounting clamps.
- Design the mold such that the features do not overhang one another in the direction that the mold opens. This is to enhance seamless removal of the die-cast parts from the mold.
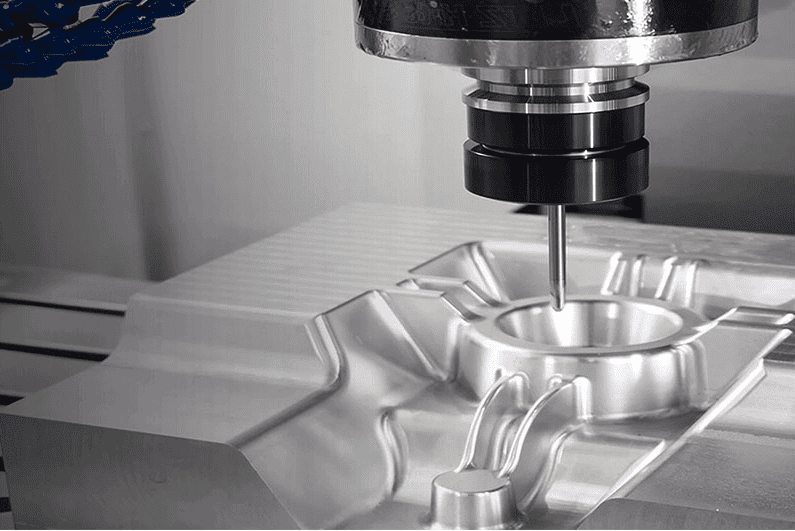
(b.) Mold core and frame machining
Machining is the process of removing excess materials from the surface of the cast parts. It cuts off unnecessary stocks around the core and cavity. It gives the mold perfect shape and geometry.
- One method of machining mold is by using the computer numerical control (CNC) machine.
- The computer-aided design (CAD) software creates the design geometry of the mold. The computer aided manufacturing (CAM) software translates the instructions from the CAD into relevant specific commands. Thereafter, CNC machine uses the output from the CAM to make the mold.
- Another method of machining mold is through Electrical discharge machining (EEM). It is also known as spark eroding, wire erosion, and spark machining.

- EDM is a metal fabrication process to get the desired shape by using electrical discharges. Here, you will obtain the desired shape through the use of an electrode. The electrode is fabricated out of graphite or copper, and it is mounted in an EDM machine.
- Using a controlled electrical source, you can use the electrode to disperse the material in the area opposite it (the electrode). Note that the electrode does not directly contact the mold.
(c.) Mold Assembly
This is the stage where the different mold parts will be fitted together. Assembly required utmost skill.
When assembling, note the following:
.
- Check the sharp edges in the cavity and cores. All sharp edges with no function requirement should be broken 0.01 radius.
- Ensure the mold base has correct markings. Check if the lifting holes for each plate are available and marked with the correct dimension. Also, confirm if the sprue and nozzle are in the correct sizes.
- Mark the hardness and type of steel used in making the mold. Ensure this is in a noticeable position.
- Be sure the water line is correctly marked in and out.
- Move the ejector plate back and forth to see if it can move freely.
- Ensure all the core pins, slide pins and guide pins are greased.
1.The design cost of the mold
- This depends on the geometry of the mold. Molds with complex shapes and geometry attract higher costs, and vice versa.
2.The material cost
- The material cost of the mold core and frame. For the mold frame, we use the 45# steel processing. We use the Japanese grade H13 for the mold core.
3.Machining cost
- Machining and assembly of mold cores and frames,Mold core processing is more complicated and there are many processes
(1.) Classification of molds
There are different classes of molds. These are:
- Single cavity mold. It has only one cavity. This produces only one die-cast part per production cycle
- Multi-cavity mold. It has more than one cavity of the same type. It produces more than one die-cast part per production cycle.
- Family injection mold: A family injection mold has more than one cavity cut into the mold. It allows multiple parts with the same material to be formed in a single cycle. Although a family mold also contains several cavities, the parts generated share a similar size but different designs.
(2.) What are the common materials used in mold making?
The common materials used in mold making include plaster (Gypsum), resin, metal (bronze, aluminium, lead, silver and gold), and casting rubber. At Castingod, we use 45# steel processing for the mold frame. For the mold core, we use Japanese grade H13.
(3.) The life span of a mold
The life span of a mold is calculated by the amount of production cycle that the mold can last. Typically, molds last between 50,000-100,000 production cycle.
(4.) Can molds be re-used in die casting?
Yes. You can re-use molds in die casting production cycles. Depending on the materials used to produce the mold, you can re-use a mold in about 5,000-10,000 production cycles.
✔ Automated Machinery
We produce our die casting mold with automated machinery. We are keen on excellent service delivery, hence, we invested heavily in our technologies and facilities.
✔ Professionals with consummate skill
Our professionals are skilled and they have vast industry experience. These professionals have consummate skill in prototype designing, development and production of die cast molds. So, with us, you can be sure of high-quality molds.
Irrespective of the mold’s size, shape, or intricacy, we are up to the task.
✔ 20+ years of industry experience
We have been providing our die casting mold services for over twenty years. This has helped us garner sufficient industry experience which we leverage in producing high-grade molds and delivering overall excellent services.
✔ Advanced and meticulous mold flow analysis techniques
In our production process, we employ advanced mold flow analysis techniques. This helps us to make enough analysis on a design before moving into the production stage.
✔ Custom-tailored tooling solution
We manufacture our molds per the customer’s needs. From the design stage to the production stage, we ensure that the products are tailored towards the specific requirements of each customer.
✔ Cost-effective
Our molds are cost-effective, while not compromising on the quality of the products.
✔ Swift delivery
We have efficient logistical arrangements in place that enables us deliver orders swiftly. We are keen on maximum customer satisfaction.
Let Castingod.com boost your business today!
Castingod have been in the business of aluminum die casting in China for more than 20 years, let a true industry veteran provide you with high quality casting parts