Many people want to learn about what types of surface finishes are available for die-casting. So, that’s the goal of today’s article. We’ll look at some factors to consider when selecting a finish and what finish options are available.
How might part design features affect the resulting finish of the part? We’ll also look at some potential quality issues resulting from various finish options and discuss how Castingod can help with questions and concerns about a suitable finish for your application.
Factors to Consider When Selecting a Finish
Some factors to consider when looking at a finish for die-casting include:
- Cosmetic appearance: Is there a specific look you’re trying to achieve, such as color or texture?
- Part ergonomics: Do you need a fingerprint-resistant coating or a specific texture?
- Corrosion requirements: Die-cast parts have inherent corrosion protection, but some applications may require higher resistance levels.
- Electromagnetic interference or RFI shielding: Are there coating options to help with this?
- Pressure tightness: Does your part need to be pressure-tight or require leak testing?
- Conductivity: Does your part need to be conductive or non-conductive or act as a heat sink?
- Project target price: Different finish options have varying costs, so knowing your budget helps you make a suitable choice.
Common Finish Options
Here’s a sampling of the finishes available. We’ve categorized them into:
- Mechanical (e.g., vibratory deburring, shot blasting, ball burnishing)
- Chemical conversion coating (e.g., anodizing, Parkerizing, trivalent clear chromate)
- Final coatings (e.g., powder coating, wet paint).
In this article, we shall use a sample part, a small aluminum piece (2.5 inches by 2.25 inches by 0.75 inches), to compare finishes. To maintain consistency, all pricing is based on a 500-piece lot size.
Please let us know if you have any questions, and we’ll do our best to address them throughout the presentation.
Mechanical Finishes
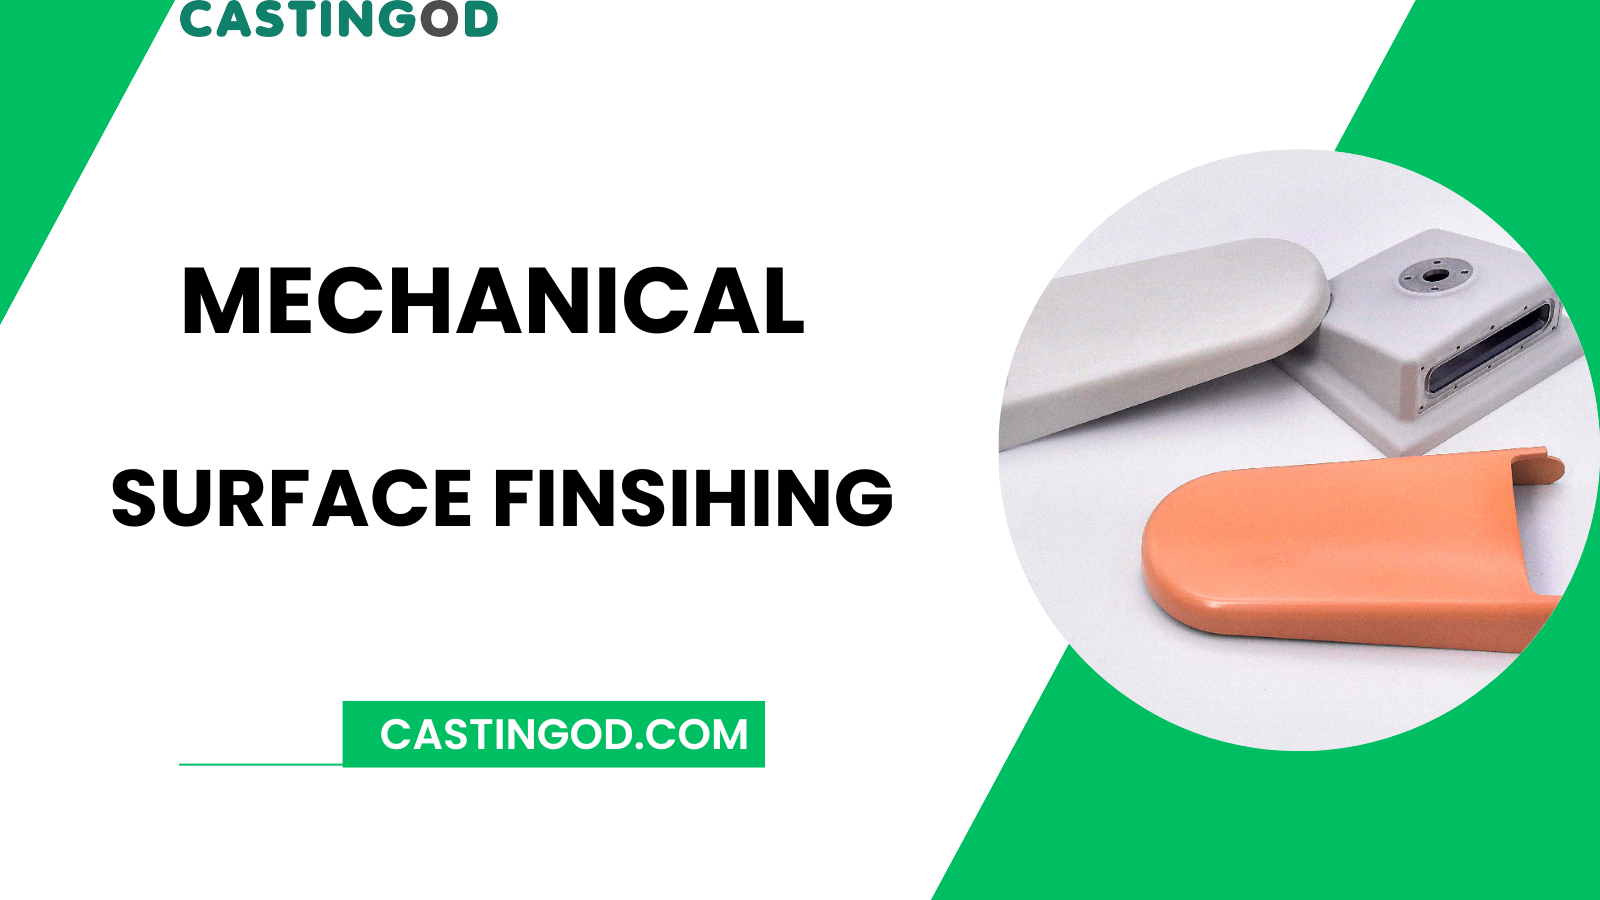
So, the pricing for all the coming examples uses a 500-piece lot size. The first section will cover mechanical finishes, including shot blasting, ceramic media, plastic media, ball burnishing, glass bead blasting, polishing, and grinding.
Benefits:
- Remove the majority of flash from as-cast parts
- Eliminate surface imperfections (flow marks, swirls) for better appearance
- Prepare the surface for subsequent coatings (roughening improves adhesion)
Example: Shot Blasting
- Process: Wheelabrator process with steel shot
- Suitable for: Aluminum parts (not recommended for magnesium or zinc alloys, alternative media available)
- Ideal for: Non-cosmetic parts, even and uniform coverage at low cost
- Limitations:
- Not highly cosmetic (may cause scratches or blistering depending on aggressiveness)
- Steel shot can be aggressive, affecting tight tolerance features
- Cost: $0.08 per part (500-piece batch)
- Ceramic Media
- Vibratory deburring process with parts in a large bowl
- Creates a smooth, fine finish ideal for plating or coatings
- Can be aggressive to fragile features
- Suitable for all three alloys (aluminum, magnesium, zinc)
- Cost: $0.12 per part
- Plastic Media
- Vibratory deburring process using small plastic media shapes
- Creates a dull, smooth finish, not very aggressive
- Suitable for fragile features and magnesium parts
- Limited edge break, may not be suitable for parts needing significant edge break
- Suitable for all three alloys
- Cost: $0.12 per part
- Ball Burnishing
- Low-cost option for achieving a mirror shine
- Works the metal to achieve desired appearance and removes burrs
- Uses high-cost stainless steel media
- Suitable for all three alloys
- Cost: $0.30 per part
- Glass Bead Blasting
- Shot blasting process for a smooth, uniform finish
- Good base for final coatings
- More labor-intensive, potential for part-matching issues
- Media wears rapidly, affecting finish consistency
- Suitable for all three alloys
- Cost: $0.35 per part
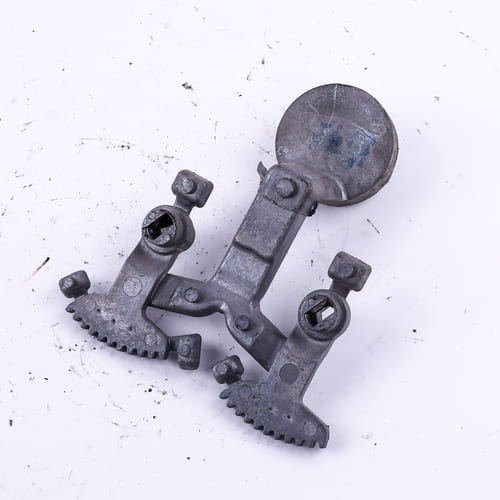
Polishing the Parting Line
- As-cast parts have a rough edge (gate vestige) left after trimming
- Smoothing this edge is necessary for a highly cosmetic finish
- Polishing removes the gate vestige for a smoother surface
- Suitable for all three alloys
- Cost: $0.42 per part
- Caution: Over-polishing can round features
Chemical Finishes
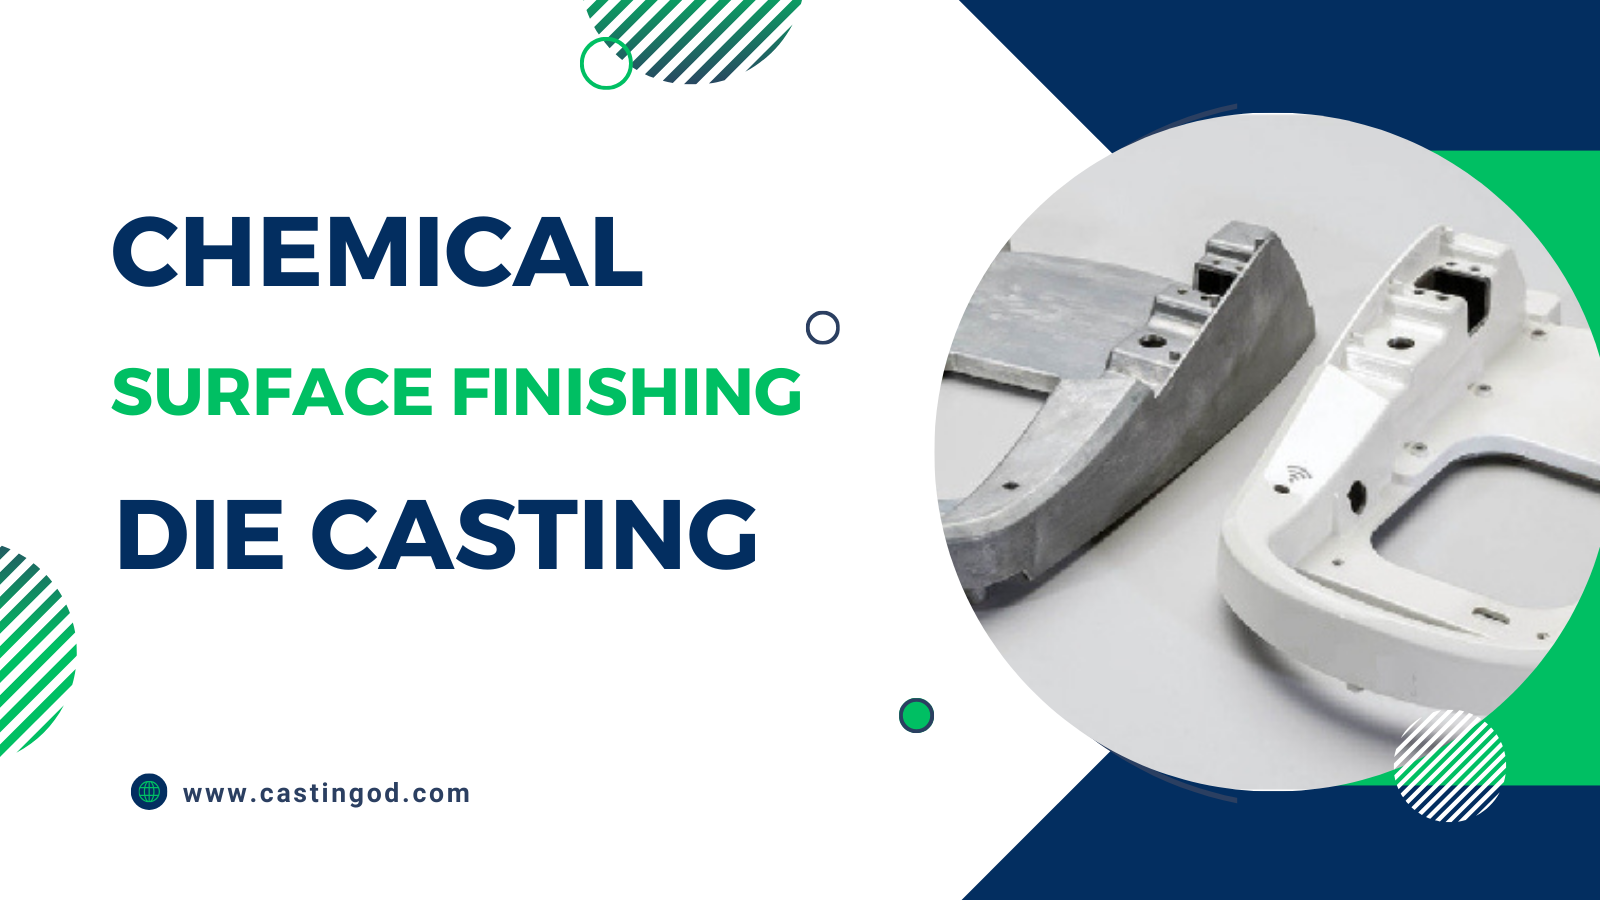
- Processed in tanks with parts rack plated or bulk processed in baskets
- Achieved through a variety of baths for the final coating
- Examples covered today: trivalent clear chromate, yellow chromate, anodizing, non-chrome yellow
The following example is ceramic media, a vibratory deburring process in which parts are placed in a table or large bowl and vibrated, creating the surface finish through interaction between the media and the part.
Ceramic Media
Ceramic media provides a smooth, fine finish, making it a good base for plating or coatings. However, it can be aggressive to fragile features, which should be considered.
This process suits all three alloy types (aluminum, magnesium, and zinc) and costs around $0.12 per part.
Plastic Media
Plastic media is another vibratory deburring process, but small plastic media is used instead. The media comes in different sizes and shapes, such as balls, cylinders, or triangles, each providing a different finish.
Plastic media creates a dull, smooth finish and is not very aggressive, making it suitable for fragile features and magnesium parts. However, it offers limited edge breaks, which may not meet the requirements for parts needing significant edge breaks.
This process is also suitable for all three alloy types and costs around $0.12 per part.
Ball Burnishing
Ball burnishing is a low-budget option for achieving a nice mirror shine. This process involves working the metal to get the desired appearance and helps remove burrs from the part.
It uses high-cost stainless steel media and is suitable for all three alloy types. It costs $0.30 per part.
Glass Bead Blasting
Glass bead blasting is another shot blasting process that provides a smooth, uniform finish and a good base for final coatings. It is more labor-intensive and often done part by part, resulting in slightly higher labor content and potential part-matching issues.
The media wears rapidly, affecting the consistency of the finish. This process is suitable for all three alloy types and has a medium cost of $0.35 per part.
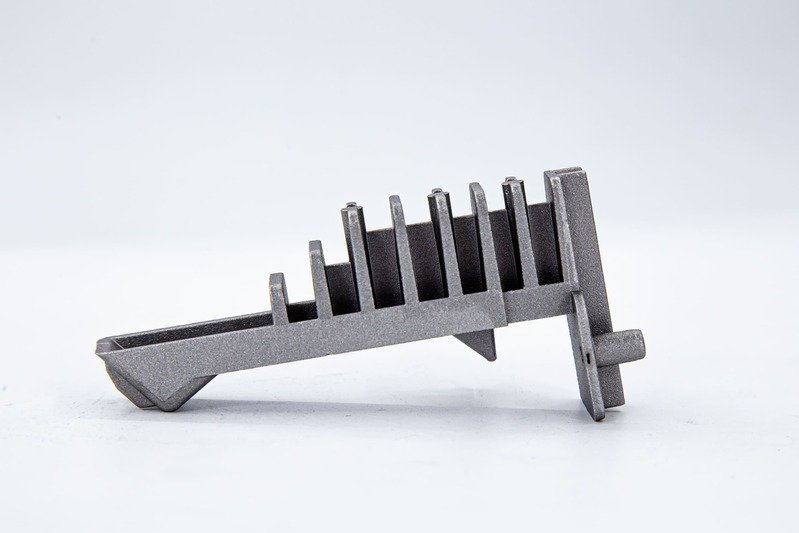
Polishing the parting line:
If you look at the image, you can see a rough edge on the part. This is the gate vestige left after the part is cast and die-trimmed. This rough edge is where the gate metal flowed into the part or overflows occurred. For many people, the as-trimmed look is acceptable, but further finishing might be required for others.
It’s not a problem if it’s a highly cosmetic finish; many times, that’s not acceptable. Even if you powder coat or wet paint on top of this, the rough area will still show through. It won’t cover up with a powder coat or wet paint; it will show.
Again, this is a more manual process where we polish the parting line. The result is shown above. The image shows what happens when you remove that gate vestige. Once a powder, wet paint, or another cosmetic finish is applied, it looks fantastic. You could never tell that a gate or any other tooling remnant was visible.
Surface Preparation for Corrosion Resistance Coatings
In all of these processes, the chemical makeup of the surface of the die casting is changed. One of the benefits of these coatings is that there’s really no added thickness to the part. So, for parts with complex features or tight tolerances, there’s basically zero added thickness, which is a good side effect of these types of finishes.
All these finishes provide additional corrosion resistance to the overall casting. Like the previous batch of options, they also provide proper surface preparation for any coatings that come after. Again, we would consider these not to be cosmetic finishes, but they can be used as final coatings if that’s all that’s required. Many of our customers do use these options as a final finish.
Trivalent Clear Chromate
The first option we’ll consider is trivalent clear chromate. It has a dull gray appearance and can sometimes have a bluish tint. The parts’ appearance and appearance are very inconsistent from batch to batch.
It provides excellent coating adhesion for any of the following finishes that might be applied. Chromate entrapment and a white powdery residue are two things to consider when considering almost all of these bath-plated processes.
These can be issues, especially with blind holes. Imagine if the part is racked and then lowered into a bath; sometimes blind holes have a hard time receiving the liquid and then getting it back out. Proper rinsing of the parts after the process typically alleviates this issue.
Again, all three alloy options are available for trivalent clear chromate, which provides medium corrosion resistance. This is a relative scale above the corrosion resistance that an as-cast part has, providing an extra layer of protection.
We would call this medium corrosion resistance. This process costs about $0.44 per part. It does not add any wear resistance to the casting and is RoHS compliant, which is important for many of our customers when reducing hazardous substances.
Yellow Chromate
Next, we’ll look at yellow chromate. It’s processed similarly and varies in color from part to part and batch to batch. We say yellow chromate, but sometimes you would be hard-pressed to call it yellow.
It does improve the adhesion of final finishes, and the blind hole issues we mentioned previously apply here as well. Again, all three alloy options provide medium corrosion resistance at a $0.44 cost. However, this one is not RoHS compliant, so that’s something to remember.
Anodizing for Die-Casting
Anodizing for die-casting provides a very low gloss, sometimes matte finish, and comes in clear or black. When processing a die casting, it gives a very non-uniform finish, which we would not consider a cosmetic look. Because of the minimal thickness applied, it is perfect for tight tolerances.
Anodizing is a nonconductive type of plating with a low film thickness. This process can be used on aluminum and magnesium; we don’t anodize zinc.
Anodizing offers a medium level of corrosion resistance at a $0.47 cost and does provide some extra wear resistance, which we call medium. It is RoHS compliant.
Typically, some sealers are applied to anodizing as a follow-up process, and some of those are not RoHS compliant. So, keep in mind to ensure that the sealer being used aligns with your requirements.
Looking at the questions, it seems there are a few about why anodizing on die castings does not look like anodizing on machined 6061. That’s an excellent question and one we get a lot.
Many people are used to seeing anodizing on machined parts with 6061 or extruded parts, where the finish is great – a nice, shiny, consistent, uniform finish. When they see anodized die castings, it looks nothing like that.
Anodizing for Die-Cast vs Machined Aluminum
- The difference is that the other processes, such as extrusion and machining of 6061 or other alloys, use almost 100% aluminum alloys.
- The die-cast alloy being used (380, 383, 390, 360) has enough other chemicals in it to prevent the nice shiny finish that you get with anodizing, especially the presence of silicon, which prevents the consistent finish.
- Unfortunately, there’s no way to make anodized die castings look the same. Different types of anodizing provide a higher level of wear and corrosion resistance, though the cost goes up.
Non-Chrome Yellow
- The last one in this section is non-chrome yellow, which gives a light gray or yellow appearance and can sometimes look mottled.
- It’s suitable for paint adhesion, and the same concerns with blind holes also apply here.
- All three alloy types are available for this process, providing medium corrosion resistance. At $0.93 per part, we would consider this more on the high side of this finishes category.
- It provides a low level of wear resistance.
- And it is RoHS compliant.
Chemical Finishes – Summary of Chromates
We don’t have anodized here, but it does visually show the differences between the three chromate finishes (trivalent clear, yellow, and non-chrome yellow). It’s a little hard to see some of the differences, but you can see the varying shades of appearance that you’ll get.
Coating Options (Final Finishes)
Okay, we’ll look at the third category of finishes we discussed, which is coatings or the final coatings. However you want to say it, these are the options that we’ll look at: e-coat, copper tin plates, varying types of powder coating, electroless nickel, and liquid or wet paint.
These are what we would consider cosmetic coatings, so they will give the part a very high level of cosmetic look.
E-Coat
- E-coat is the first one we’ll discuss. It provides a black, glossy finish. Black is the overwhelming choice of color for this. Some other colors are being developed for die-casting, but they’re used very little. So, 99.9 percent of the time, you get a black part if you want an e-coat.
- It does provide a very consistent thickness, at a thousandth or a little under a thousandth of an inch, and it’s very good for complex designs and part features.
- This is an insulating finish, so if you’re looking for a finish for a heatsink or something else, this is probably not what you’re going to want because it would not allow the heat to escape.
- One concern for this coating is air pockets. Again, this was done in a bath process, so there’s a potential for air pockets to be entrapped underneath the e-coat finish.
- This process is good for all three types: aluminum, magnesium, and zinc.
- It provides a very high level of corrosion resistance at a medium cost of $0.44, a medium level of wear resistance, and it is RoHS compliant.
Copper Tin Plating
The next option we’ll look at is copper tin plating. It provides a high, glossy finish and is solderable, making it a good choice for applications where you may need to solder the part to other components. This plating offers a very uniform finish, making it suitable for tight tolerance features with a very thin layer of thickness.
Copper tin plating is a conductive coating that provides excellent EMI shielding, making it a good option for protecting electronics. We use copper tin plating for aluminum and zinc alloys but not magnesium. It provides a medium level of corrosion resistance, a medium cost of $0.70 per part, good wear resistance, and is RoHS compliant.
Powder Coating
Powder coating is a widespread final finish for many of our customers. As you can see from the two images (smooth and fine texture), both finishes are powder coats. Powder coating comes in a variety of textures and is considered a final finish for highly cosmetic parts.
It’s a long-lasting and durable option, and most powder coat houses offer a wide variety of stock colors. With some time and money, you can also develop custom colors to match a color chip or another part in your assembly.
However, maintaining uniform thickness can be challenging. Parts are hung on a rack and electronically charged to attract the powder when it’s applied. Depending on the part configuration, the thickness may be inconsistent in deep or tall features.
All three options (aluminum, magnesium, and zinc) are available for this process. Powder coating provides a high level of corrosion resistance, a medium cost of $0.80 per part, and very high wear resistance. It is also RoHS compliant.
Powder Coating Considerations
There are a few things to remember with any type of powder coating or wet paint. One concern is the rack mark that remains behind after the process. Discussing this with the die casters beforehand will help you find a good position for the rack mark to minimize its impact.
A couple of other quality concerns to look out for when doing powder coating include outgassing and orange peel condition. Outgassing is caused by entrapped subsurface air that escapes during the heating and curing process.
We take this into account during tool design by looking for ways to minimize porosity or move it away from cosmetic areas. If our analysis shows potential for porosity in an area that must have a nice cosmetic finish, we may redesign the tool or take other measures to minimize it.
Preheating the parts at the powder coater before processing can also help control outgassing. Discussing this with your die caster can help ensure a successful outcome.
Another common issue is the orange peel condition. This appears as a textured surface, almost like an orange peel. It occurs due to an over-application of powder, often when trying to apply powder to a deep recessed area of a part.
As a result, the parts or features above get more coating. You can minimize this issue by changing the way parts are racked.
Electroless Nickel
The next finish we look at is electroless nickel. It provides a dull, matte finish with very high wear resistance. The plating is very uniform, which is good for complex features and parts with intricate designs.
It has excellent EMI shielding capabilities, although it may tarnish or darken over time. Electroless nickel is a very nice finish used on all three alloy types (aluminum, magnesium, and zinc).
Electroless Nickel offers medium corrosion resistance and is at the higher end of the cost range at 82 cents per part. It has a high level of wear resistance and is RoHS-compliant.
Wet Paint
Wet paint is another popular choice for highly cosmetic parts. As you can see in the image, it comes in both smooth and textured options. Wet paint cures at lower temperatures than powder coating, significantly reducing concerns about outgassing.
It also offers UV light resistance, good batch-to-batch matching, and a lower film thickness than powder coating. Wet paint can be processed on all three alloy types (aluminum, magnesium, and zinc) and offers a medium level of corrosion resistance.
The cost can vary depending on the batch size, with the price listed here including setup charges for a 500-piece batch. Wet paint offers a medium amount of wear resistance and is RoHS compliant.
Wet Paint Considerations
There are a couple of paint issues to look out for with wet paint, including blistering and dust below the surface. These problems are typically caused by improper cleaning of the part before the paint is applied.
It’s important to work with a reputable company that understands proper surface preparation to ensure the part is ready to be painted. Sagging can also occur if too much paint is applied or if parts are racked in a way that allows the paint to drip.
Design for Finish
This section discusses how the design of a part can affect the final finish and what features to consider during the design phase.
- Deep recessed holes
- Tall exposed features
- Flat cosmetic surfaces vs. curved surfaces
- Tight tolerance features
- Masking
- Rack points
Tall Exposed Features
Tall exposed features, such as a mounting boss that’s high compared to the rest of the part, can be a challenge for some finishes like powder coating. As mentioned earlier, when the part is hung and electrically charged, these taller features tend to act like lightning rods, attracting a larger amount of powder or other finishing material. If a tall feature can’t achieve a consistent finish, we might need to mask it or consider redesigning it.
Masking
Masking is a technique used to protect areas that should not be coated or have tight tolerances that can’t accept even a thousandth of an inch of coating. We often mask electrical connector areas or areas with a ring or other component that needs a tight tolerance before applying powder coat or wet paint.
Deep Recessed Holes
With any of the finishing options that involve a bath process, it can sometimes be difficult to get the liquid coating in and out of deep recessed holes. This is something to consider during the design phase, especially if a uniform finish is important for these areas.
Flat Cosmetic Surface vs. Curved Surface
The same coating can visually appear different on a flat surface versus a curved surface. This is something to keep in mind when designing the cosmetic aspects of your part.
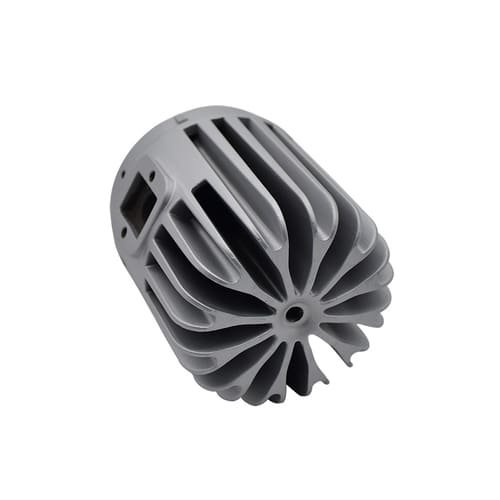
Texture in a Die Cast Mold
The image in the bottom right corner shows an example of texture incorporated directly into the die cast mold itself. This texture is then replicated on every part produced using that mold.
If you know that certain areas of a part need texturing and others do not, incorporating the texture into the mold itself can be a good option. This way, the texture is applied consistently during the casting process, eliminating the need for additional masking steps later.
Tool Design Considerations
The design of the die cast tool can also impact the final finish of the part. There are things we can do upfront during the tool design phase that will affect the part’s finish. One example we mentioned previously is in-tool texturing, where the texture is incorporated directly into the mold. This is just one way that tool design can influence the final finish.
How Castingod Can Help You with Finishing
MagnaSoft Flow Simulation
Castingod utilizes MagnaSoft flow simulation software to analyze potential issues that could affect the final finish, such as porosity, outgassing, and pressure requirements. By identifying these concerns upfront, we can design the die cast tool to accommodate them and achieve a better finish. Additionally, the analysis helps us determine areas where we might want to avoid placing gates or ejector pins to maintain a clean cosmetic surface.
Optimum Casting Machine Size Selection
We emphasize the importance of using a diecast machine with the appropriate tonnage for the application. A machine that is barely powerful enough for the part size may not be able to apply enough pressure to fill the mold correctly, resulting in a less cosmetically appealing surface finish.
Castingod’s Finishing Expertise
In-House Experts and Vendor Network
Castingod has a team of in-house finishing experts and a network of vendors worldwide who have been collaborating with us for decades. This allows us to offer a wide variety of finishing options to meet your specific needs. Read out available finishing treatment.
Finishing Library with Sample Coupons
We maintain a comprehensive finishing library that includes coupons showcasing the majority of the coatings discussed in the webinar, along with many others. These coupons are produced from actual die castings, allowing you to see how the finishes will look on your parts. We can also provide you with specific finish coupons upon request.
Conclusion
Thank you for reading this article on finishing options for die casting. We hope you gained valuable insights. Please visit our website or contact us if you have any questions or need help selecting the right finish for your project.